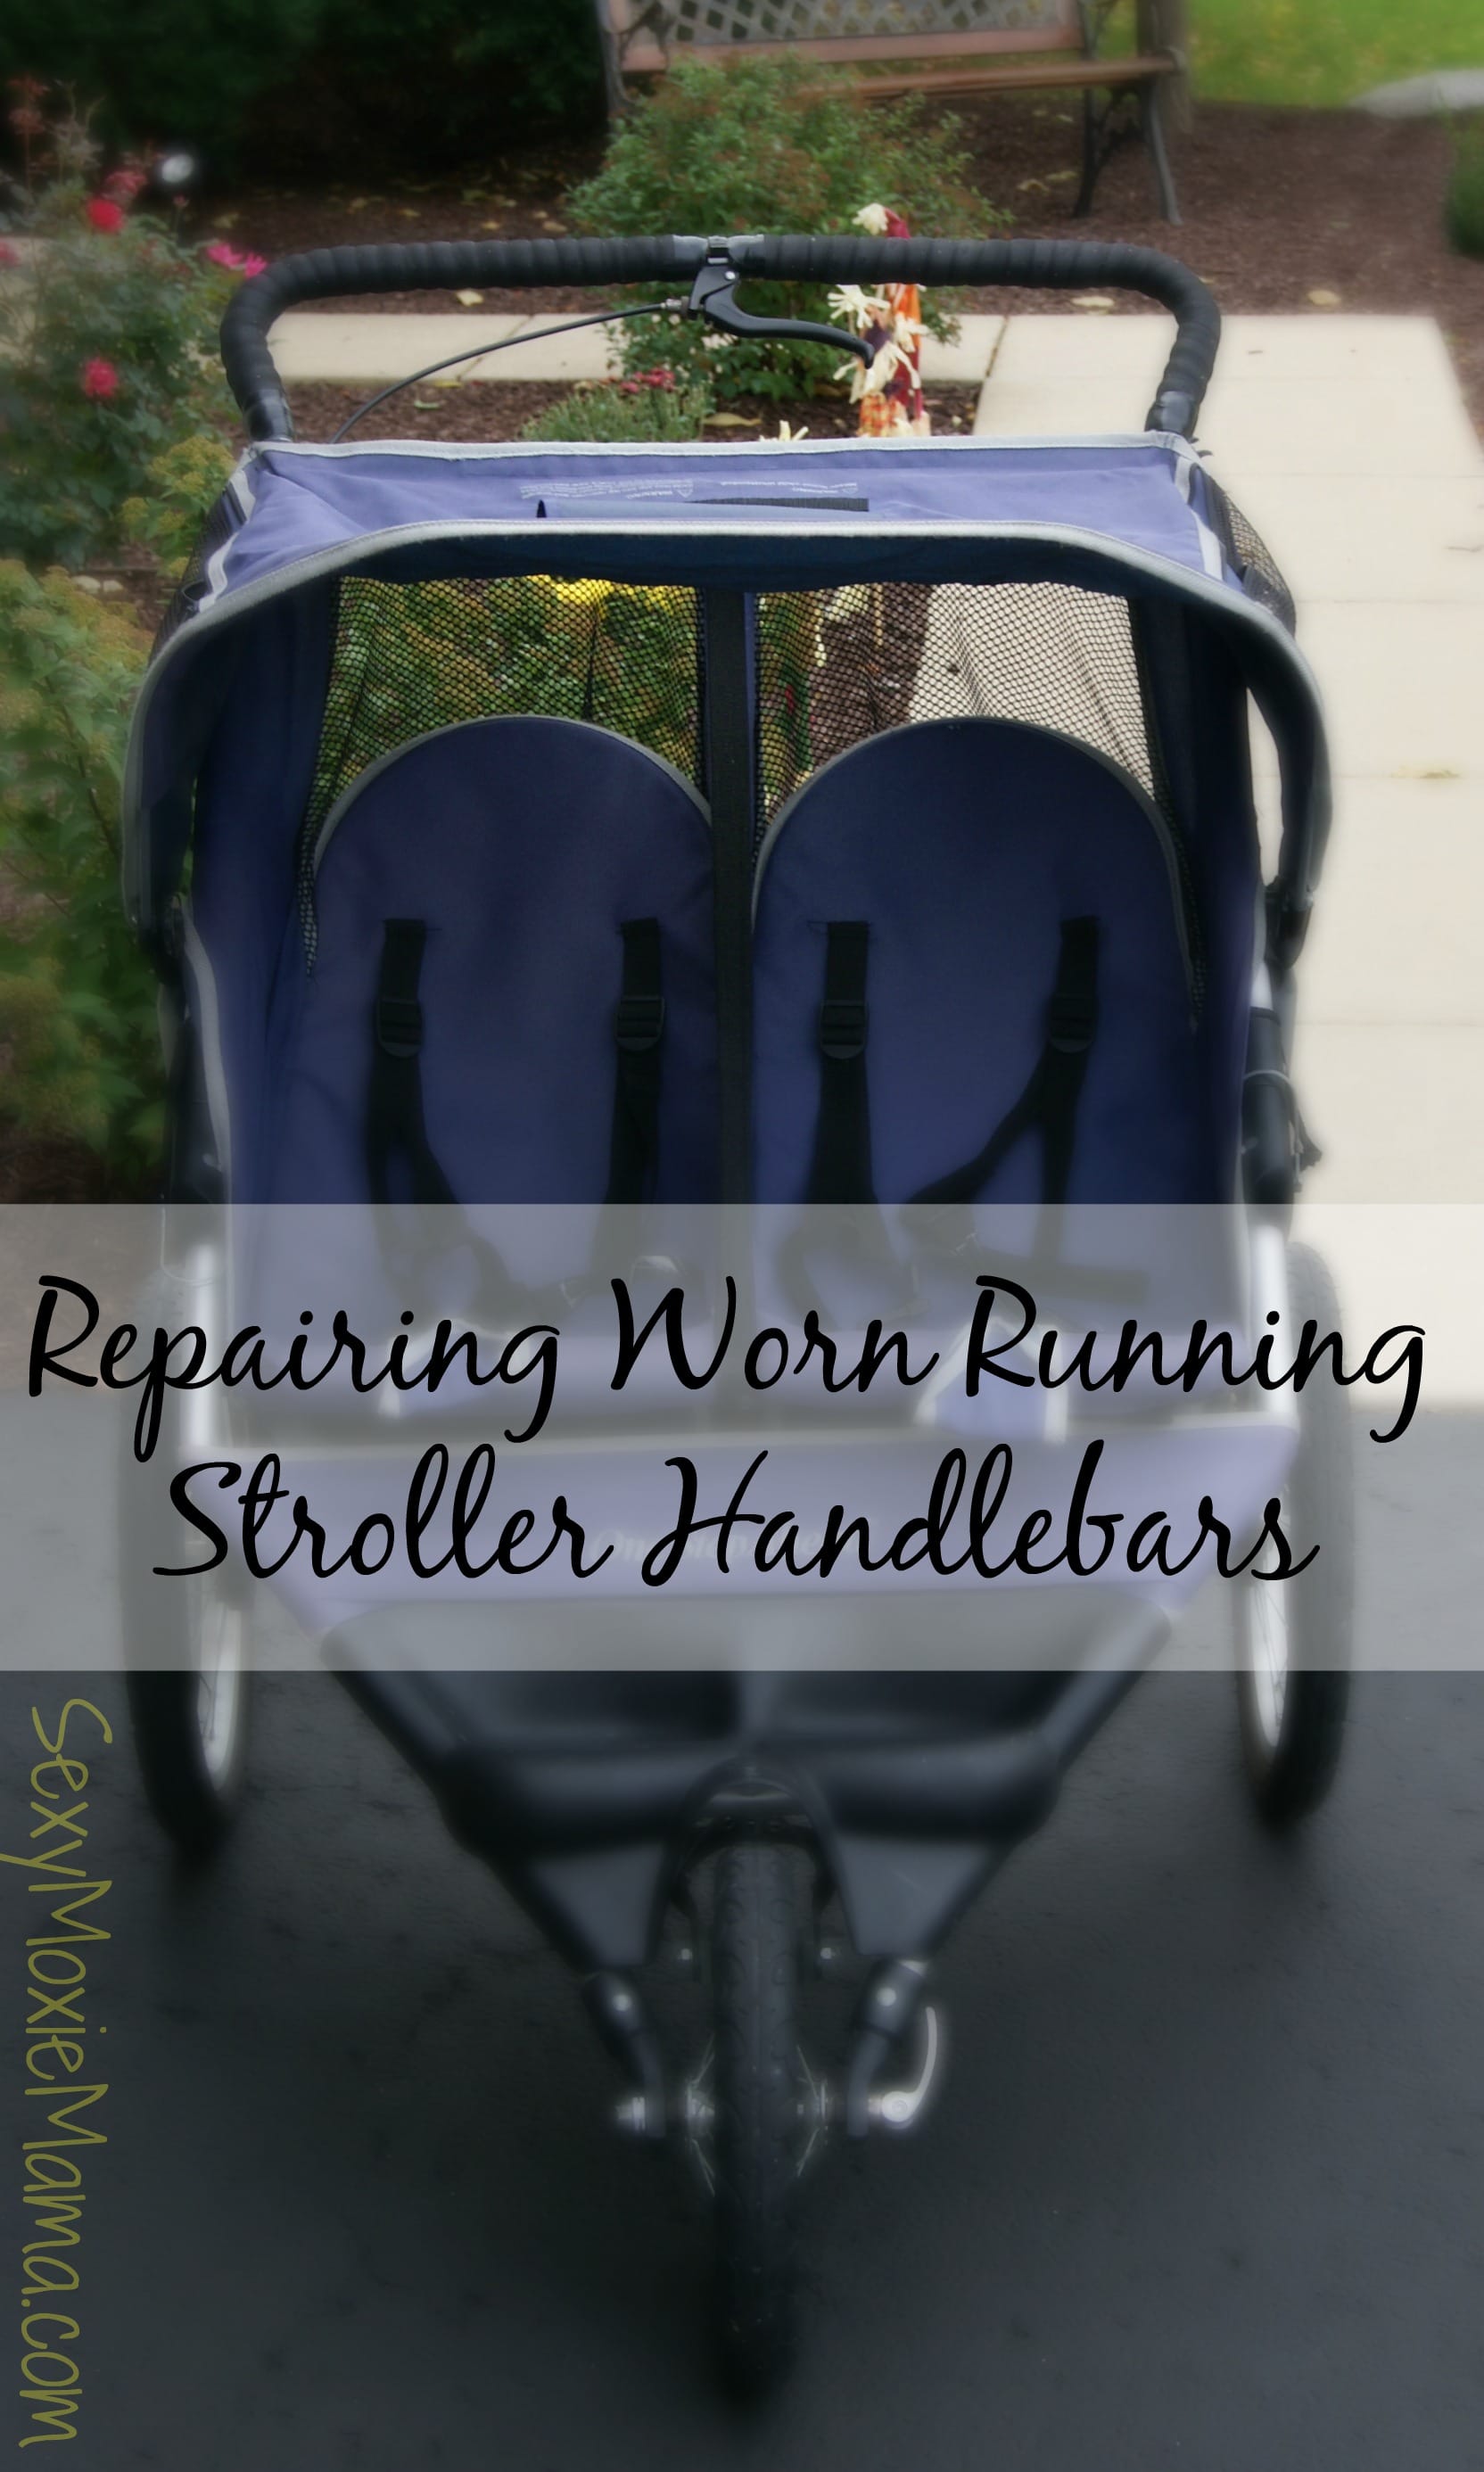
Last week, after attempting to get long walks in with my kids pushing a Graco DuoGlider, I finally gave in and set my sights on a double running stroller. The thought of pushing that heavy DuoGlider one more mile was enough to motivate me to seriously look this time (not just glance through websites and then never purchasing like I had in the past). But buying a new one was just not practical at this time. So, I set out to look on my local garage sale site.
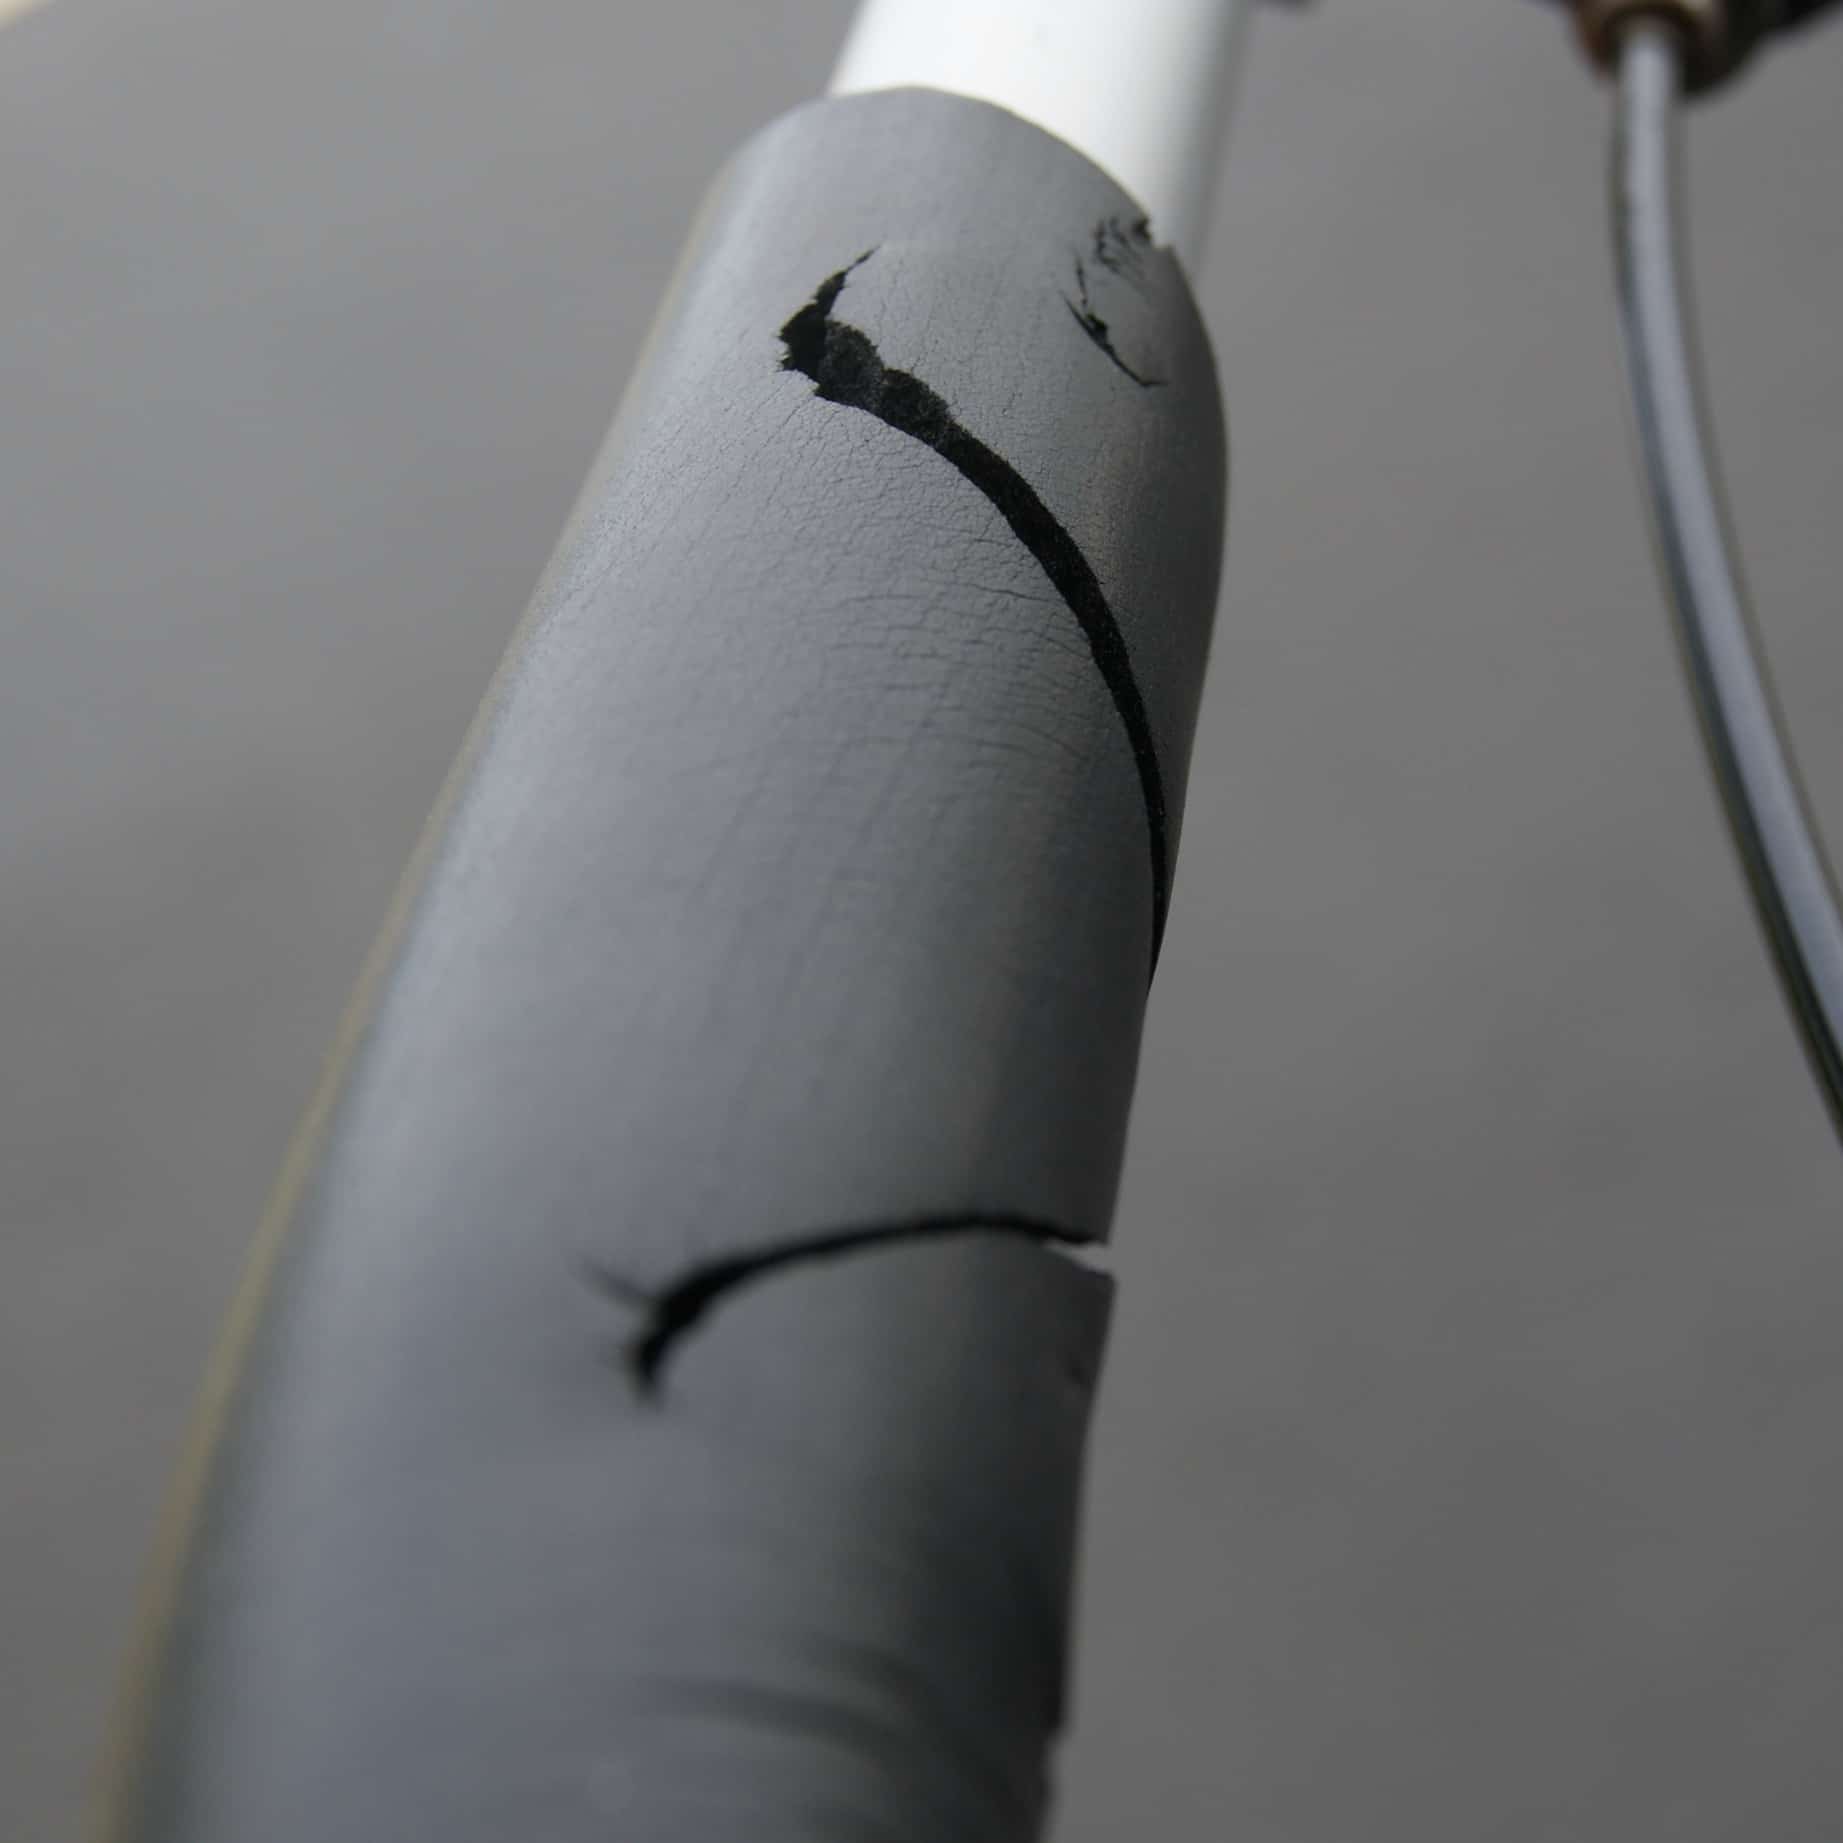
Luckily, I found one immediately. It was perfect and looked almost new with only one caveat, the handlebars were a little torn. Not a big deal, as long as the wheels and 5-point harnesses work, I can deal with it. I went to look at it and noticed that the stroller handlebar foam grips were torn a lot on one handle. Believing that it was fine, I bought it anyway. Guess what? After one walk, the torn stroller handlebars , even though my hands don’t even touch the torn part, did bother me. It was more of a cosmetic issue than anything.
I set out to find replacement stroller handlebar grips. I had found a Universal Stroller Handle Sleeve that just zips up over the existing (torn) stroller handlebars. That looked like a viable option, the only problem was is that there is a handbrake in the middle of the handlebar that I did not want to have to take off and replace. There had to be a better option. I got to talking to my dad about my dilemma and he suggested trying bicycle tape. GENIUS! Why had I not thought of that?
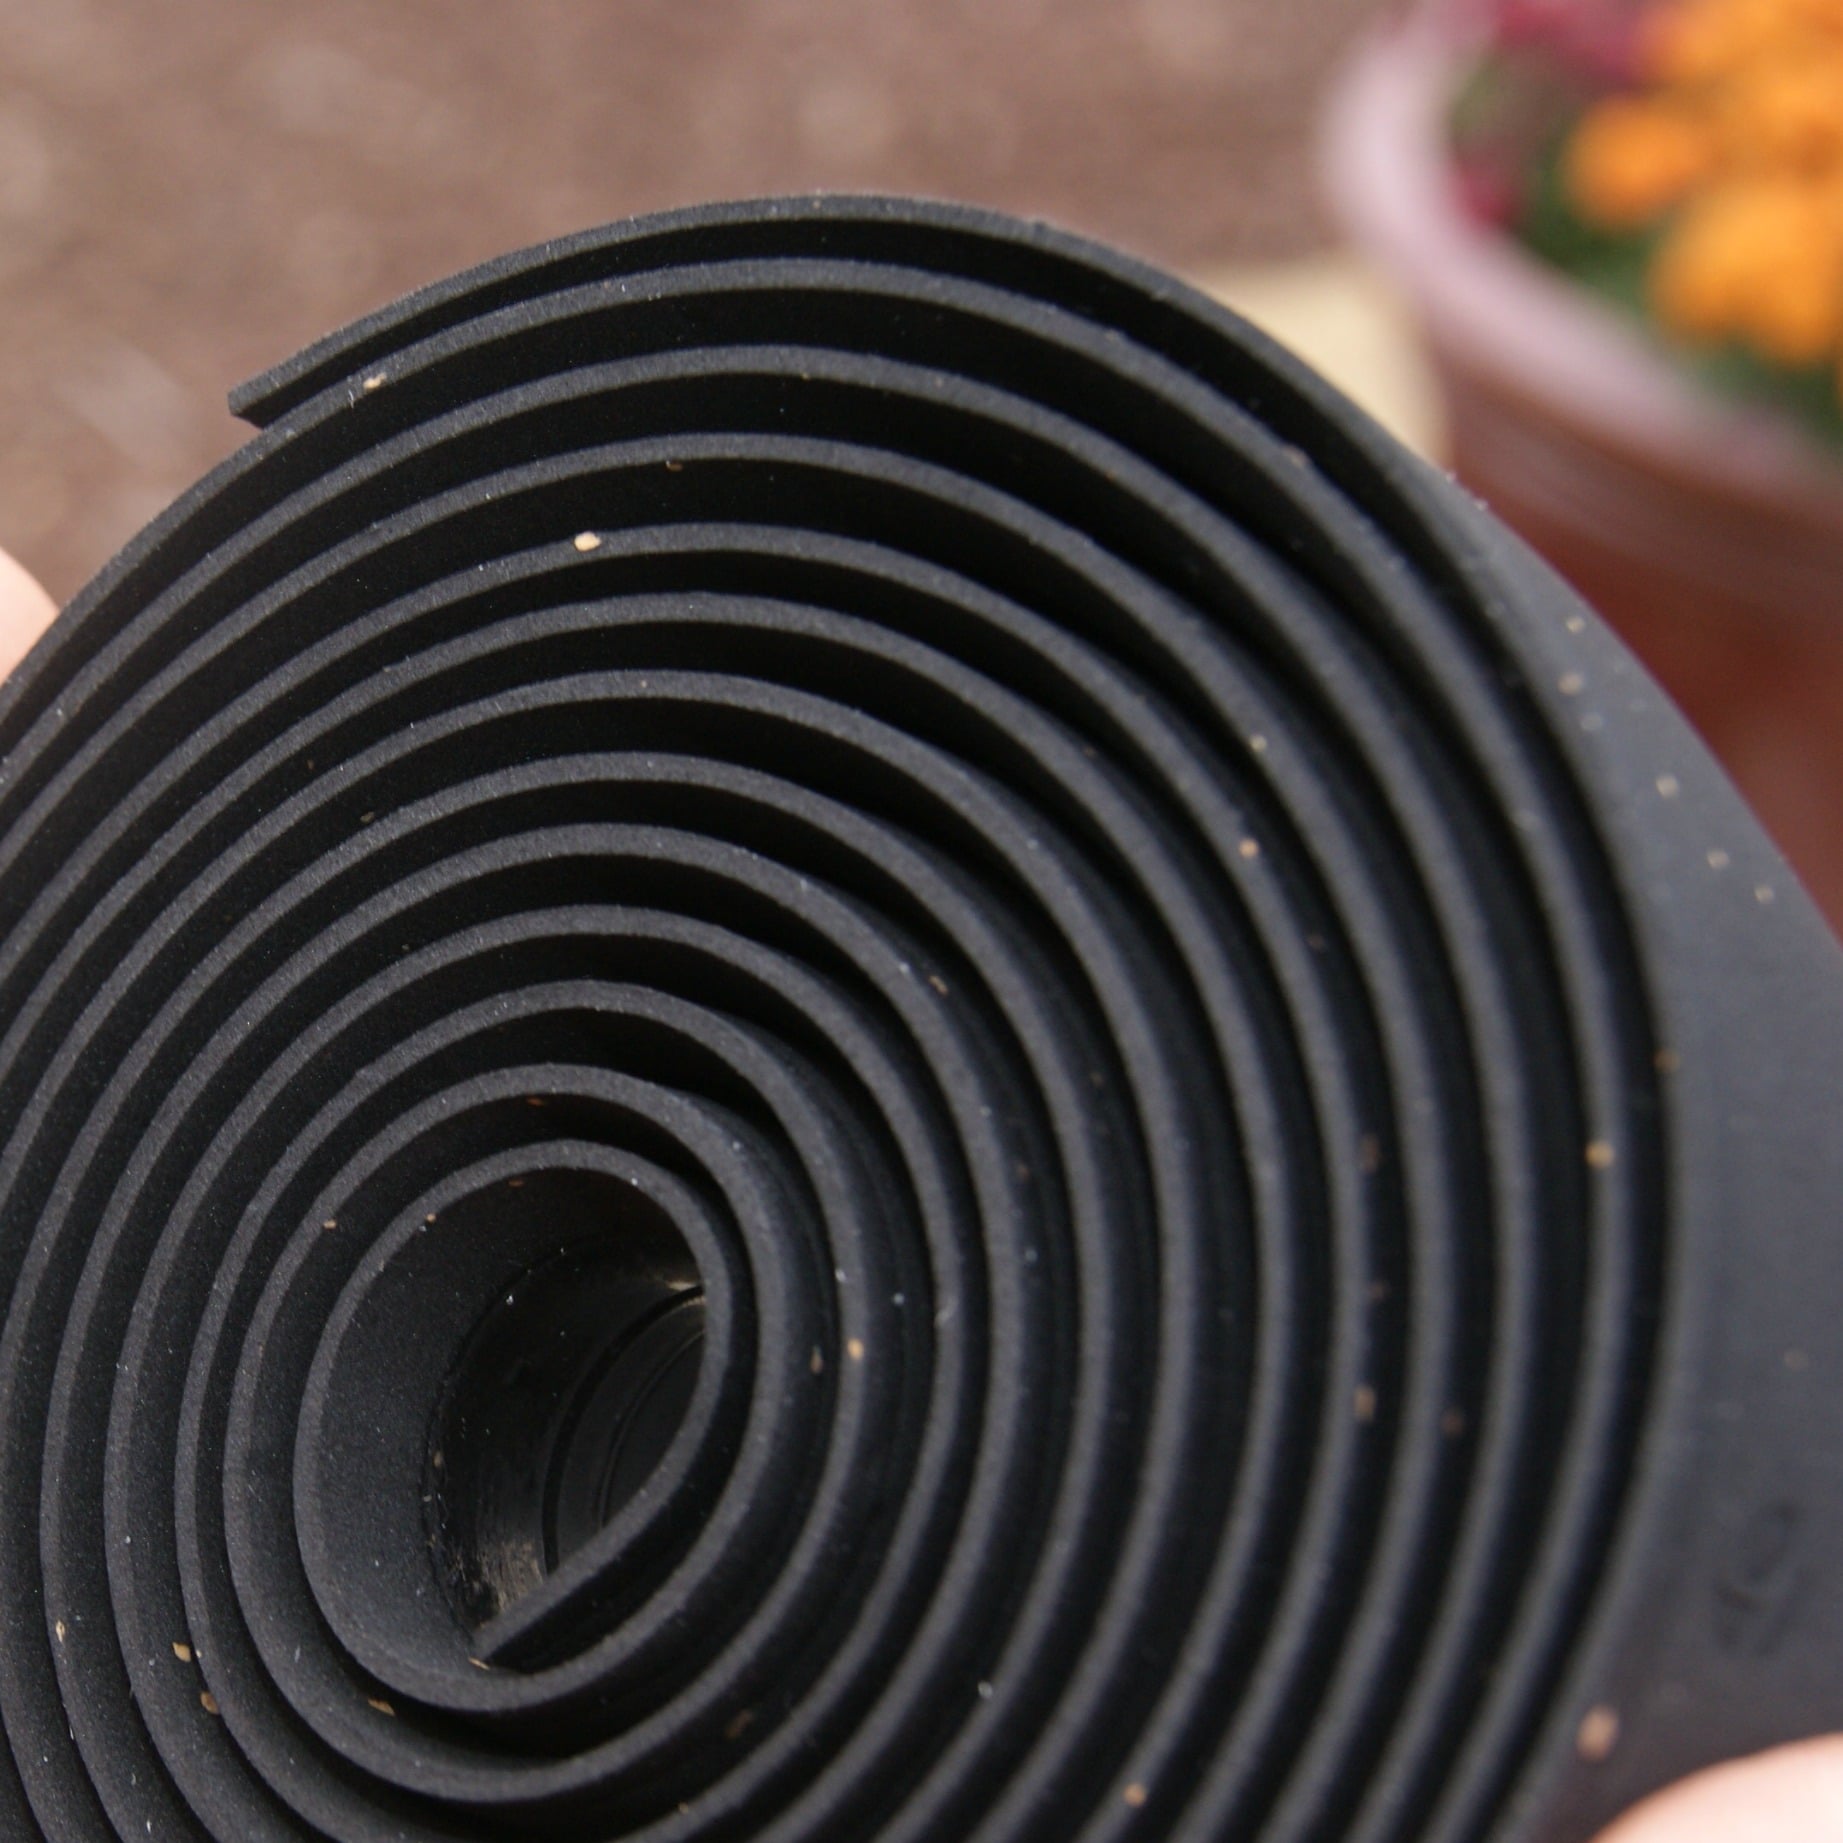
I started looking online and found that bicycle handlebar tape comes in many colors, thicknesses, and materials. I visited my local bicycle shop in town and found Gel Cork Handlebar Tape in black. This tape is soft and sturdy cork and gel constructed bicycle tape. It becomes slightly tacky when wet for better grip. It also is extremely fade and water resistant so it will look new longer. When I mentioned to the sales clerk what I was planning on using it for he said “that’s a great idea”. I thought so too (thanks Dad!).
This stuff is great and can be used to repair running stroller handlebars (as I am planning on doing) or a regular stroller grips. The backing of this tape is tacky but not adhesive so it will stay in place but will not leave a sticky residue if you need to unwrap and rewrap it. This tape is so durable, you can bend it, stretch it, and pull on it (within reason) and it does not tear. Plus, once it is on the handlebars, it is actually thicker than the original handlebar foams and can be taken off to be wash if it gets dirty.
Hopefully this tutorial will help you restore your stroller handlebars to a like new condition that you can love. So you can extend the life of your existing stroller or bring back to life a road worn beauty.
Time
10-15 minutes
I thought that replacing the handlebars was going to be a daunting task but I actually had the project completed in 10 minutes (that is with taking pictures as I went along).
Materials
- Bicycle tape such as Gel Cork Handlebar Tape by MARQUE , Fouriers, or Planet Bike.
- Scissors
- Electrical tape
- Stroller
Instructions
- Place all materials that you are going to use very close by (Trust me, you have to use both hands when wrapping the handle bars, you REALLY don’t want all your work to unwind because you have to walk across the room to get the scissors…yes that did happen).
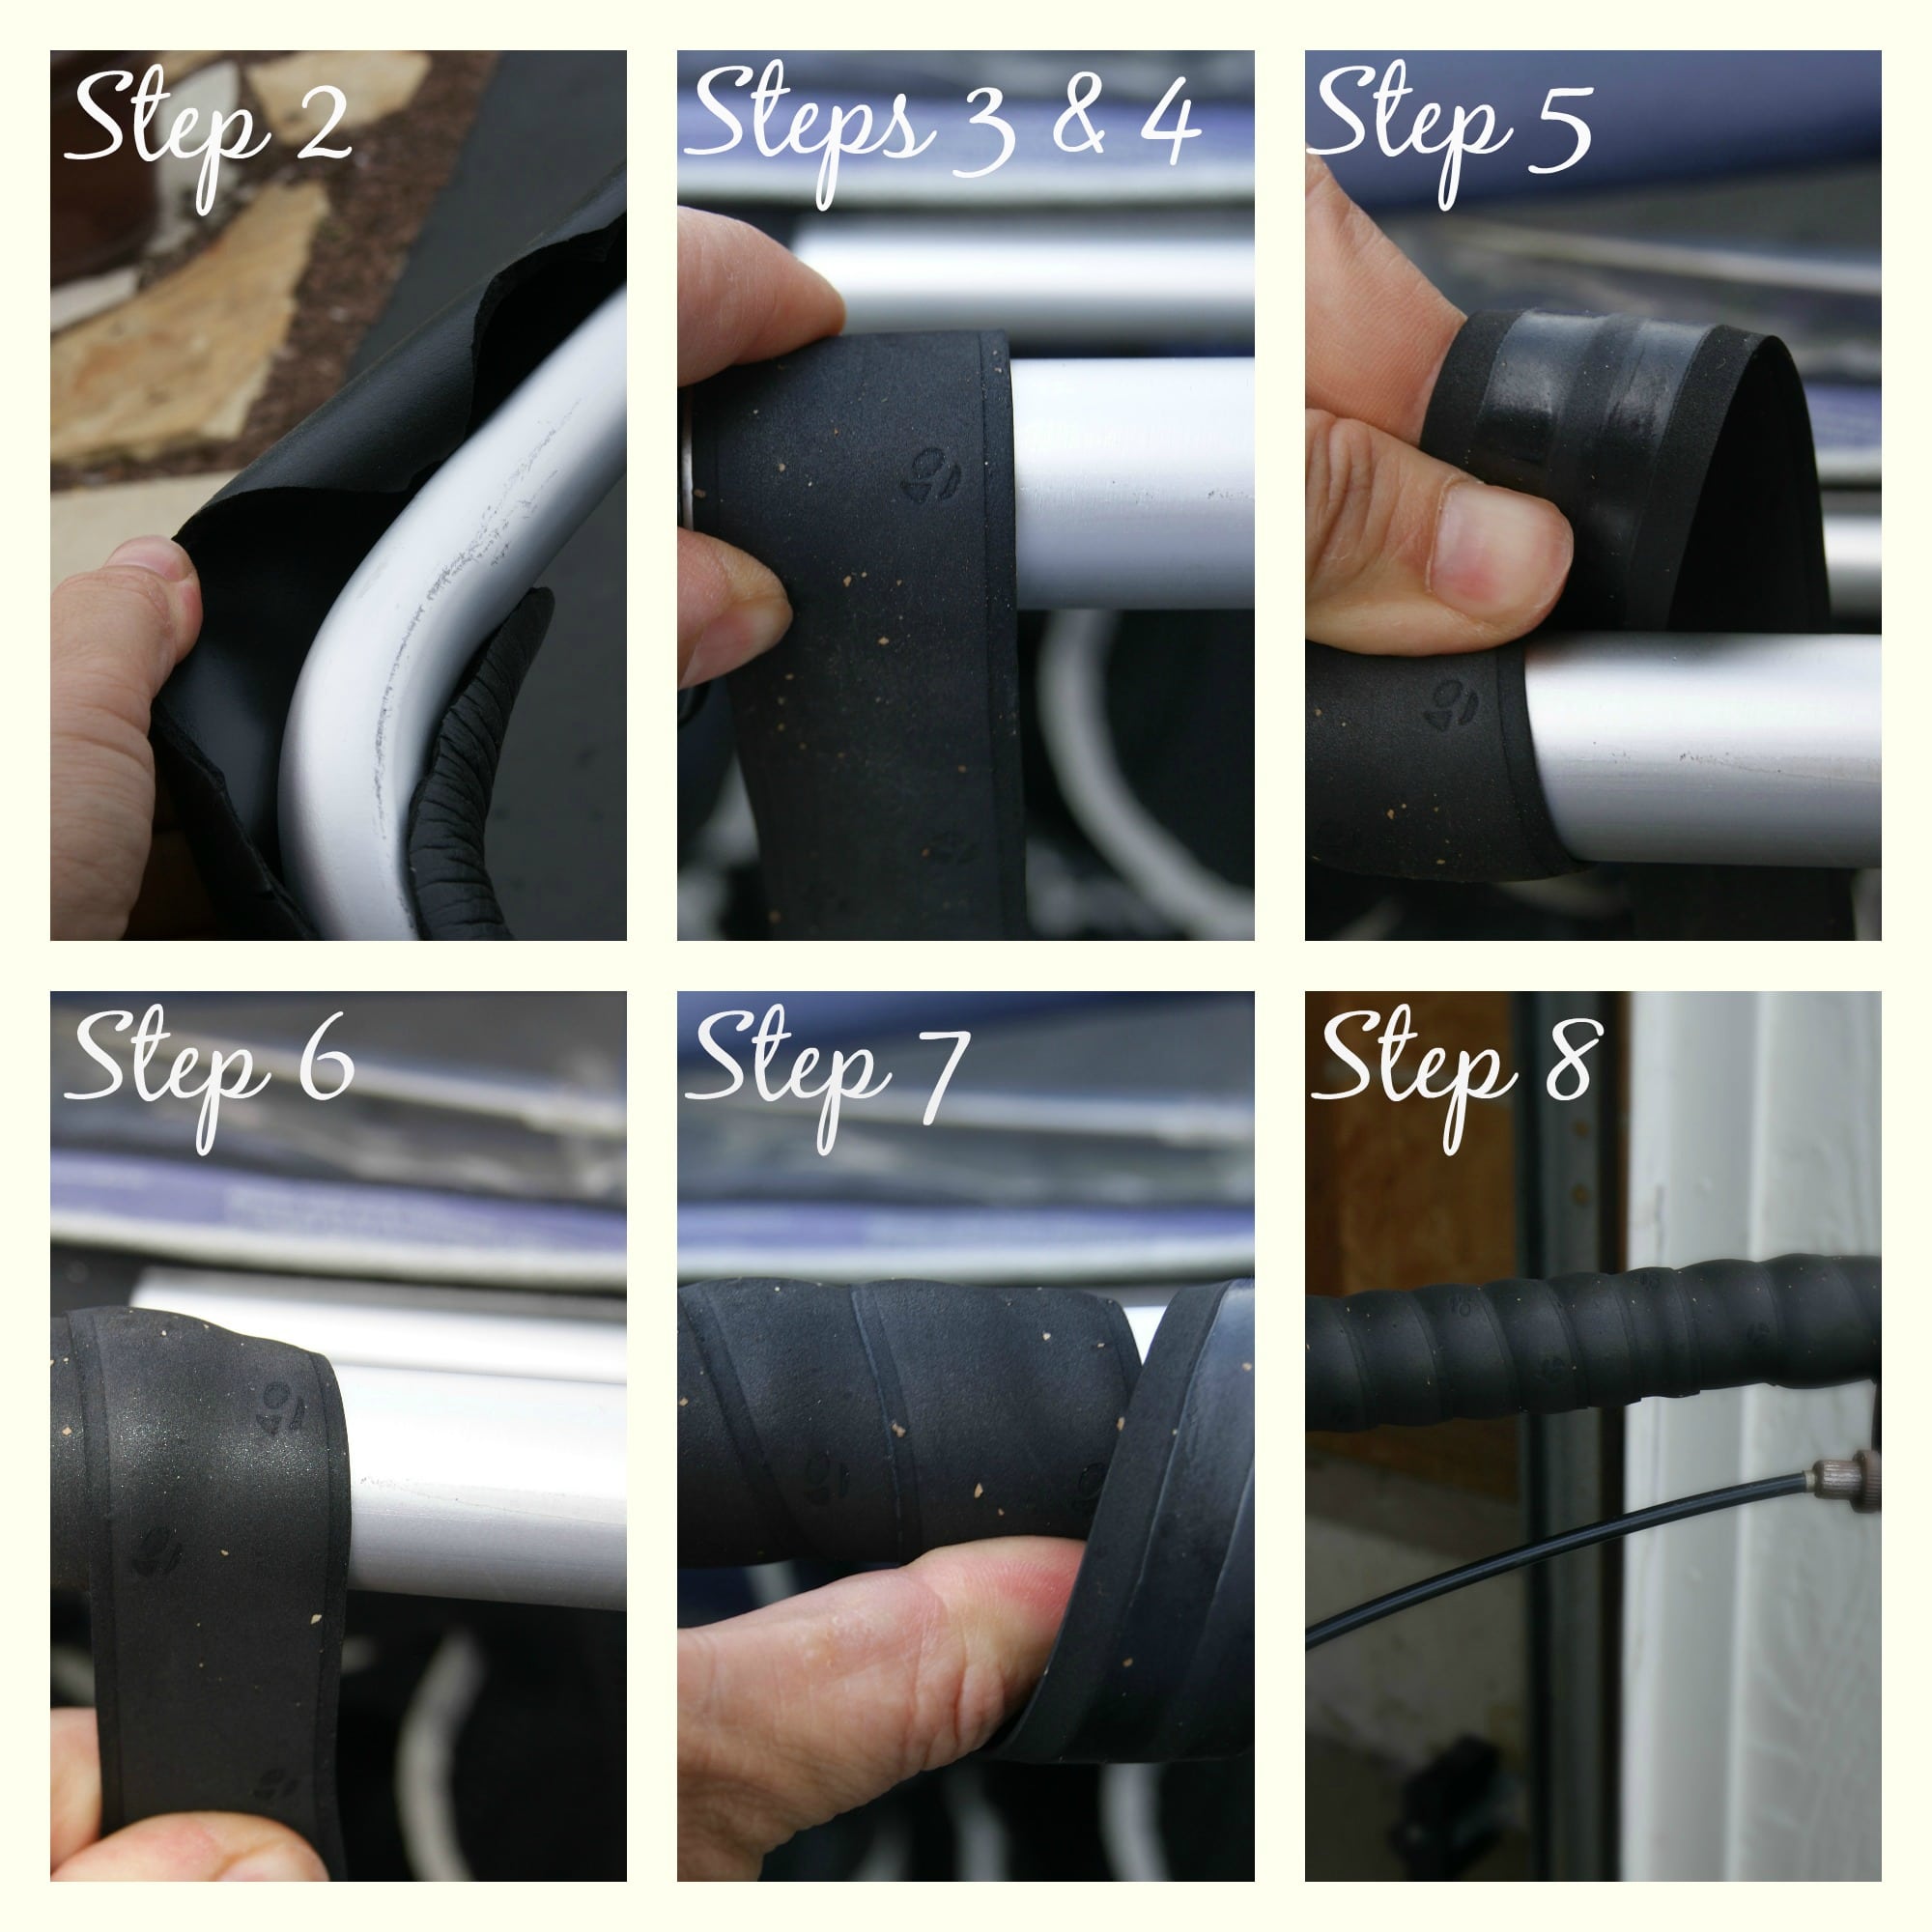
- Remove old foam handlebars using scissors. My handlebars were so worn that they tore right off.
- If you have a hand brake like I do on my running stroller, start with one roll of handlebar tape at the top of the left handlebar. (If you have a straight bar without anything impeding it you can start at the top or bottom).
- Align the tape flush with the brake mount. Hold firmly in place.
- Next, wrap around the handlebar by overlapping the previous wrap by about 1cm, or ½ the width of the previous wrap, at about a 30 degree angle, making sure to pull the tape very snug.
- Continue wrapping, keeping the width and the tightness of the wraps as consistent as possible until you get to the end of the bar.
- At the end of the bar, hold the tape in place. Wrap a bit of electrical tape (about 2 inches worth) from just past where the last wrap stops to over the last wrap, continuing to hold it firmly in place. (Note: bicycle handlebar tape comes with finishing tape that is similar to electrical tape. I found these pieces not to be long enough to hold the last wrap in place and thus resorted to the electrical tape which looked sleeker anyway).
- Place another piece of electrical tape at the top of the starting wrap to ensure that it is secured.
- Continue with the right handlebar, following the above steps 3-8.
Note: Some bicycle enthusiasts recommend wrapping the left side bar clockwise and the right side bar counterclockwise, starting from the bottom of each handlebar. I found this method not to be as secure as starting from the top and wrapping counterclockwise on the left and right.


Smart idea! This adds some extra padding, too.
I never heard of bicycle tape, how cool! I had the same problem and used tennis racket tape with great results. It was much grippier than the original foam.☺
I have a double Bob with the same problem. I don’t have a brake on my bar, will one box work or should I get two? I couldn’t find the length of the tape for the brand you use. My bar is about 30 in.
I used two rolls for mine because I wanted extra cushioning. Make sure that you wrap it very tight so it does not try to unravel later.
Thanks ?
Do you reckon u Could u use it for tyres ?
No, this will not work for that.
Thanks for sharing this, trying to figure out which approach we are going to take with our 5 year old BOB, this will be super handy in helping us decide if we want to wrap our own or use the universal one. Thanks!